
先日、商品一覧ページにある商品並べ替え(ソート)オプションのカスタマイズ方法について解説しました。
あわせて読みたい

【EC-CUBE 4】 商品一覧ページの並び順(ソート順)を新規追加するカスタマイズ
本記事では、以下のように商品一覧ページ右上に表示される並び順(ソート順)の種類を増やすカスタマイズについて紹介します。 新たに「更新順」というソート機能を追加…
本記事では、以下のような新しく作成したページに、同様の商品並べ替え(ソート)オプションを追加する方法について解説します。
実装例
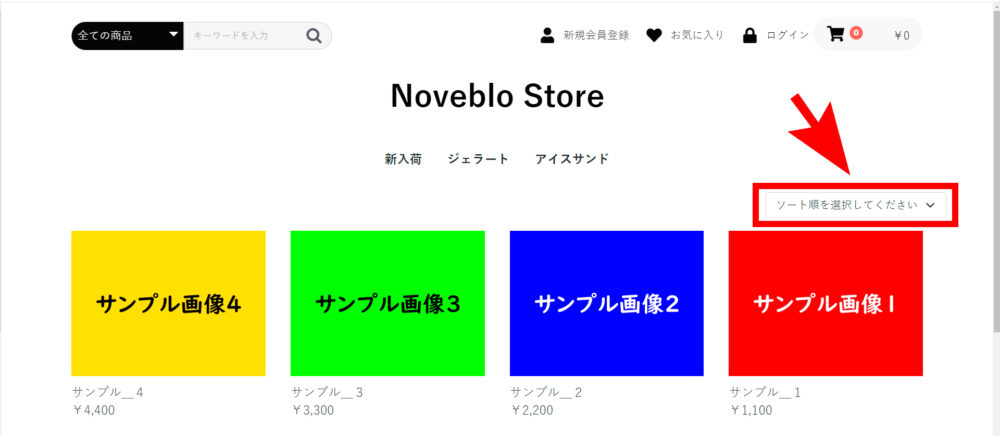
右上にソート順(並び替え)が選べるドロップダウンリストを設置。
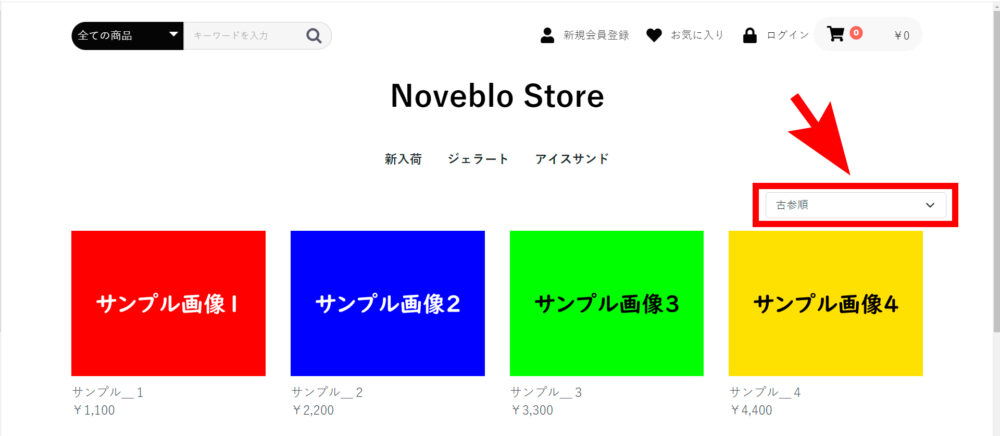
選択した内容に応じて、商品の表示順が入れ替わる
開発前にデバッグモードの設定をお薦めします
デバッグモードを設定しておくと、エラーが起きたときに詳細情報が表示されるようになります。
エラー箇所を探しやすくなるので、開発前に設定しておくのをオススメします。
デバッグモードの設定方法については 以下記事 で解説しています。
カスタマイズ後は、デバッグモードの解除を忘れないように。
目次
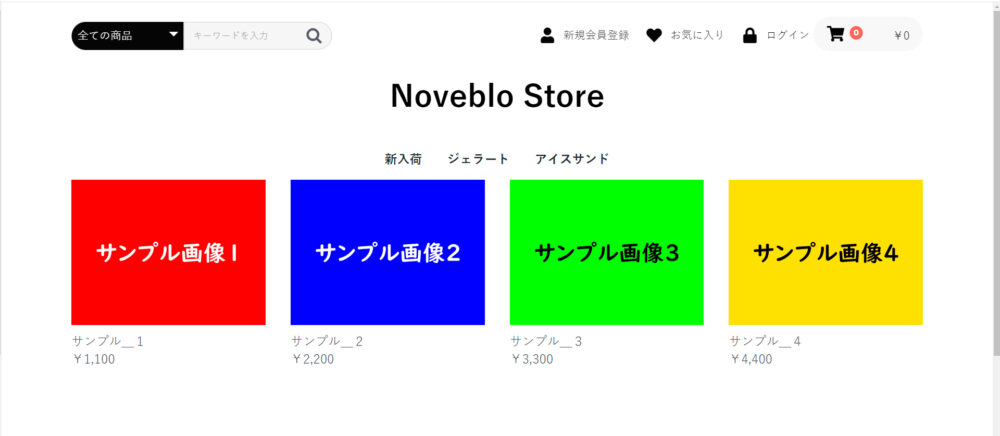
特定のタグが付いた商品を表示するページに、ソートオプションを実装する
以前本サイトで紹介した、特定のタグを付けた商品のみを抽出し、一覧ページを作る方法 で作成したページに、デフォルトの商品一覧ページと同じようなソートオプションを実装してみます。実装前は以下のような表示になっています。
実装の手順
- フォームタイプ(FormType)の作成:ドロップダウンリストを生成するためのファイル
- リポジトリ(Repository)の作成:特定の商品を特定の順序で取得するファイル
- コントローラ(Controller)の作成:FormType、Repositoryを使って、Twigテンプレートにフォームと取得商品を渡すためのファイル
- Twigテンプレートの作成
STEP
フォームタイプ(FormType)の作成:ドロップダウンリストを生成するためのファイル
以下のSortType.phpファイルを作成し、「Customize/Form/Type」にアップします。
<?php

namespace Customize\Form\Type;

use Symfony\Component\Form\AbstractType;
use Symfony\Component\Form\Extension\Core\Type\ChoiceType;
use Symfony\Component\Form\FormBuilderInterface;

class SortType extends AbstractType
{
    public function buildForm(FormBuilderInterface $builder, array $options)
    {
        $builder
            ->add('orderBy', ChoiceType::class, [
                'choices' => [
                    '新着順' => 'new',
                    '古参順' => 'old',
                ],
                'placeholder' => 'ソート順を選択してください',
            ]);
    }
}
FormTypeについてはこちら
【EC-CUBE 4】FormTypeを使ってフォームを生成する方法
エンティティのフォーム作成をもっと簡略化するには? この記事では、「新たにエンティティのタイプクラスを作ってフォームを自動生成する」方法について紹介しています…
STEP
リポジトリ(Repository)の作成:特定の商品を特定の順序で取得するファイル
以下のCustomProductRepository.phpファイルを作成し、「Customize/Repository」にアップします。
<?php

namespace Customize\Repository;

use Eccube\Repository\ProductRepository;

class CustomProductRepository extends ProductRepository
{
    public function findProductsByTagId($tagId, $sortOrder='DESC')
    {
        $qb = $this->createQueryBuilder('p');
        $qb->innerJoin('p.ProductTag', 'pt')
            ->innerJoin('pt.Tag', 't')
            ->andWhere('t.id = :Tag')
            ->setParameter('Tag', $tagId)
            ->orderBy('p.id', $sortOrder);

        return $qb->getQuery()->getResult();
    }
}- 既存のProductRepositoryを拡張しています。
- findProductsByTagIdメソッドを定義しています。
- 第一引数に指定したIDのタグをもつ商品を抽出し、第二引数で指定した順(指定しなかった場合はDESC = 降順)に並べ替えます。
Repositoryの拡張についてはこちら

【EC-CUBE 4】デフォルトのRepositoryを拡張するカスタマイズ
この記事では、既存のリポジトリを拡張して新しい機能(メソッド)を追加するカスタマイズについて紹介します。 【動作環境】EC CUBEのバージョン:4.3.0サーバー:XSer…
STEP
コントローラ(Controller)の作成:FormType、Repositoryを使って、Twigテンプレートにフォームと取得商品を渡すためのファイル
以下のTagProductsController.phpファイルを作成し、「Customize/Controller」にアップします。
<?php

namespace Customize\Controller;

use Symfony\Component\HttpFoundation\Request;
use Symfony\Component\Routing\Annotation\Route;
use Symfony\Component\HttpKernel\Exception\NotFoundHttpException;
use Sensio\Bundle\FrameworkExtraBundle\Configuration\Template;
use Eccube\Controller\AbstractController;
use Customize\Form\Type\SortType;
use Customize\Repository\CustomProductRepository;

class TagProductsController extends AbstractController
{
   /**
     * @var CustomProductRepository
     */
    protected $customProductRepository;

    /**
     * @param CustomProductRepository $customProductRepository
     */
     public function __construct(CustomProductRepository $customProductRepository) {
        $this->customProductRepository = $customProductRepository;
    }

    /**
     * @Route("/sample", name="sample")
     * @Template("sample.twig")
     */
    public function index(Request $request)
    {
        $form = $this->createForm(SortType::class);
        $form->handleRequest($request);

        $direction = 'DESC'; // デフォルトのソート方向(IDが新しい順)

        // フォームが送信された場合
        if ($form->isSubmitted() && $form->isValid()) {
            $orderBy = $form->get('orderBy')->getData(); // 選択されたソート順

            // ソートの方向を決定
            if ($orderBy === 'old') {
                $direction = 'ASC'; // 古参順(IDが古い順)
            }
        }

        // IDに基づいてソート
        $TagProducts = $this->customProductRepository->findProductsByTagId(4, $direction);

        return [
            'TagProducts' => $TagProducts,
            'form' => $form->createView(),
        ];
    }
}
フォームが送信された場合、されていない場合で処理を分岐させます。
また、ルーティングやタグIDなどは使用したい状況に合わせて修正します。
Controllerの作成についてはこちら
【EC-CUBE 4】user_dataを含むページのControllerを新規に作成する方法
管理画面から新しく作成したページ(URLに「user_data」が含まれるもの)について、 Controllerってどこにあるの? Controllerを新しく作成するには? ControllerのRout…
STEP
Twigテンプレートの作成
最後に、Twigテンプレートにフォームを埋め込んで完成です。
{% extends 'default_frame.twig' %}

{% block stylesheet %}
<style>
    .sortForm-container {
        display: flex;
        justify-content: flex-end;
        width: 100%;
        margin: 16px 0;
    }
</style>
{% endblock %}

{% block main %}
<div class="sortForm-container">
  {{ form_start(form, {'attr': {'id': 'sortForm'}}) }}
    {{ form_widget(form.orderBy, {'attr': {'onchange': 'this.form.submit()'}}) }}
  {{ form_end(form) }}
</div>
  <div class="ec-shelfRole">
      <ul class="ec-shelfGrid">
          {# TagProductsに格納されているデータを順に取り出し、TagProductに代入 #}
          {% for TagProduct in TagProducts %}
              <li class="ec-shelfGrid__item">
                {# 商品画像の表示 #}
                <p class="ec-shelfGrid__item-image">
                    <img src="{{ asset(TagProduct.main_list_image|no_image_product, 'save_image') }}" alt="{{ TagProduct.name }}" loading="lazy">
                </p>
                {# 商品名の表示 #}
                <p>{{ TagProduct.name }}</p>
                {# 価格の表示 #}
                <p class="price02-default">
                    {% if TagProduct.hasProductClass %}
                        {% if TagProduct.getPrice02Min == TagProduct.getPrice02Max %}
                            {{ TagProduct.getPrice02IncTaxMin|price }}
                        {% else %}
                            {{ TagProduct.getPrice02IncTaxMin|price }} ~ {{ TagProduct.getPrice02IncTaxMax|price }}
                        {% endif %}
                    {% else %}
                        {{ TagProduct.getPrice02IncTaxMin|price }}
                    {% endif %}
                </p>
              </li>
          {% endfor %}
      </ul>
  </div>
{% endblock %}
あわせて読みたい

【EC-CUBE 4】カスタマイズのまとめ
EC-CUBE 4について、著者自身が学習・実践してきたカスタマイズ方法をまとめています。(学習状況に合わせて随時更新中) EC-CUBEとは? ネットショップの製作や管理が…